
Whin or Lose
PRO Tips
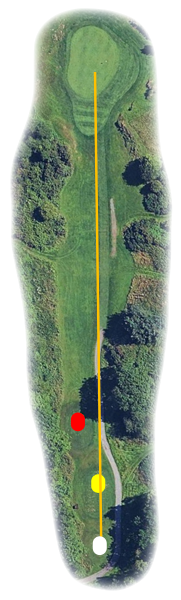
As the name suggests, this is a hole where many a good round can come unstuck. If you want to post a winning score, the key is to minimise the damage this hole can inflict.
The green sits below a raised area on the right, while the ground rises from the tee towards the green. Once on the putting surface, the dominant slope runs from right to left.
A quality approach shot is essential to give yourself the best chance of finding the green. However, don’t be fooled by a ball that appears to have safely landed on the putting surface – the severe slope on the left can quickly send the ball running off the green and down the bank.
Play for the right side of the green and favour the safer part of the putting surface. Avoid chasing a flag positioned towards the left, as a slightly mis-hit approach can quickly turn into a costly recovery. On this hole, playing conservatively can be the difference between protecting your score and watching a good round unravel.
Yardages
| TEE | PAR | YARDS | SI | |
|---|---|---|---|---|
| White | 3 | 180 | 7 | |
| Yellow | 3 | 164 | 7 | |
| Red | 3 | 135 | 11 |